
How to Make a Wet Room Waterproof
Waterproofing is the most important part of any wet room. Get it right, and the space will perform reliably for years. Get it wrong, and problems can appear very quickly.
Leaks, damp patches, and hidden water damage are almost always caused by failures beneath the surface. Once tiles are down, these issues are difficult and expensive to fix.
In this guide, we’ll be looking at how waterproofing actually works, where things commonly go wrong, and how those problems can be avoided.

What “Waterproof” Really Means in a Wet Room
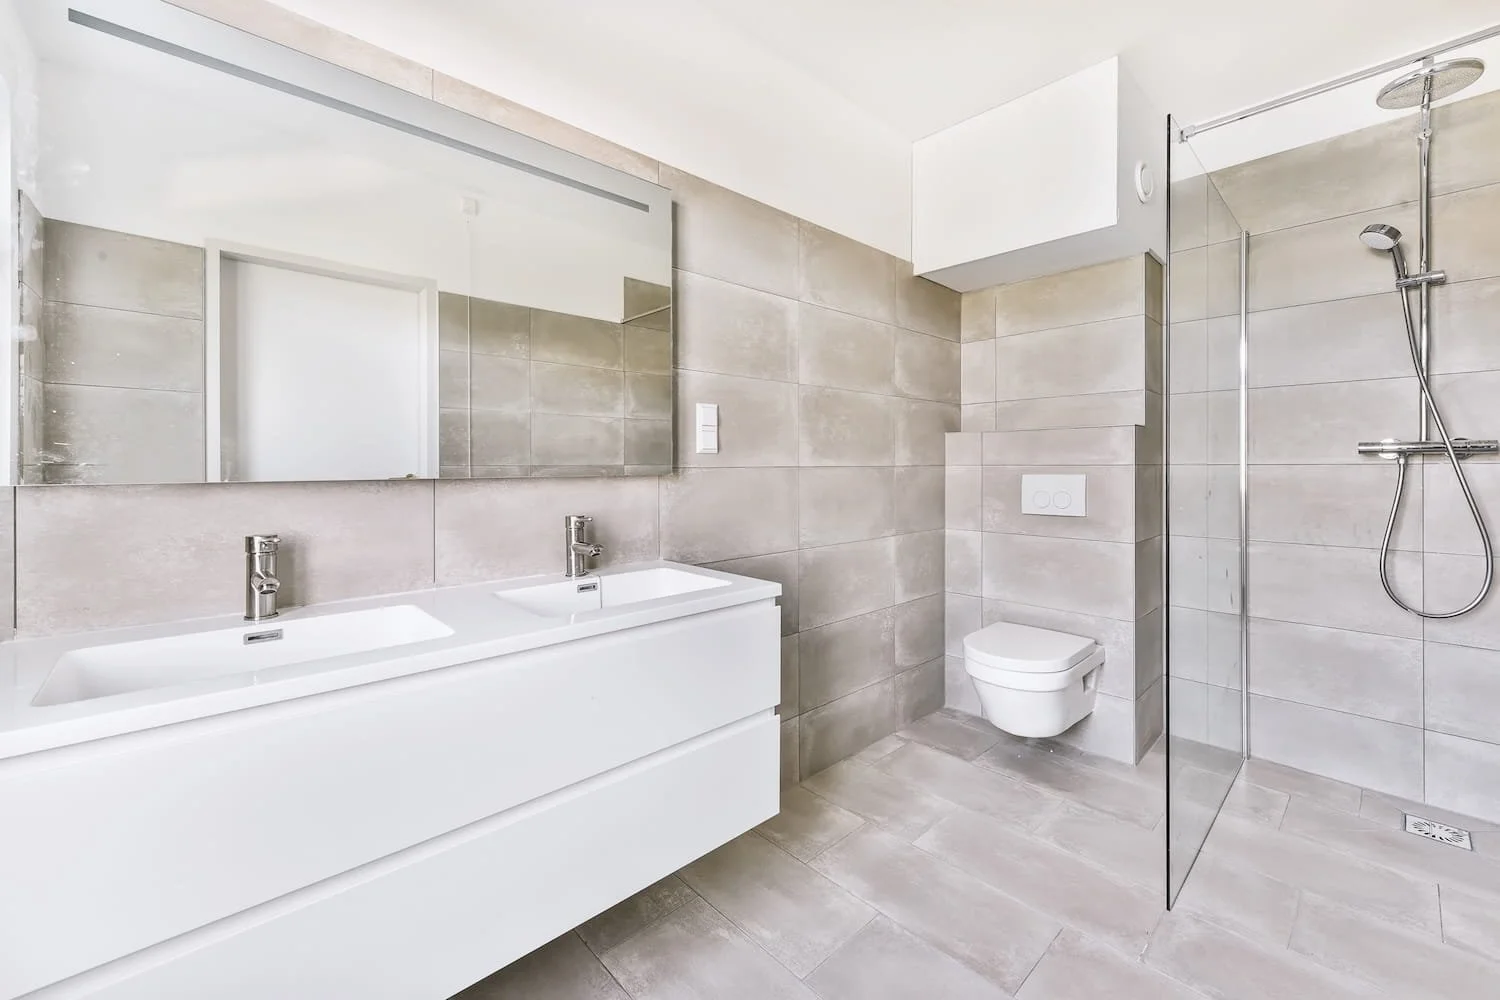
A wet room is not waterproof simply because it has tiles. Tiles and grout are water-resistant, not waterproof. Water can and does pass through them.
True waterproofing happens underneath the finished surfaces. It involves creating a continuous, sealed barrier that prevents moisture from reaching the structure below, including floors, walls, and adjacent rooms.
In a wet room, water does not just flow across visible surfaces. It also:
Seeps through grout lines
Moves into corners and joints
Finds its way around drains and pipework
This is why wet rooms require a fully sealed system rather than isolated protective measures. Every surface that could be exposed to water must be treated as part of the same waterproofed area.
If any section is missed or poorly sealed, water will find it.
The Core Waterproofing System (What Needs to Happen)
A waterproof wet room relies on a system, not a single product. Each stage builds on the last, and skipping or rushing any part increases the risk of failure later on.
Preparing the Substrate Properly
Everything starts with the surfaces underneath. Floors and walls need to be stable, clean, and free from movement. If the substrate flexes or cracks, the waterproofing layer above it will fail.
Timber floors, uneven screeds, and poorly prepared walls are common problem areas. Waterproofing products are only as reliable as the surface they are applied to.
Creating a Fully Sealed Tanked Area
Tanking is the process of sealing the wet room so water cannot escape into the structure. This usually involves applying a waterproof membrane or liquid system across the floor and up the walls.
The key point is continuity. The floor, walls, and junctions must all be treated as one sealed area. Partial tanking or missed sections often lead to leaks beyond the shower zone.
Sealing Corners, Joints, and Penetrations
Corners and joints are the most common failure points in wet rooms. These areas experience movement and concentrate water flow.
Pipework, outlets, and fixings also need special attention. Reinforcement tapes and collars are used to ensure these weak points remain watertight over time.
Waterproofing Around the Drain
The drain is the highest‑risk detail in a wet room. Water naturally flows toward it, so any weakness here is quickly exposed.
A properly sealed connection between the drain and the waterproofing system is essential. If this junction fails, water can bypass the surface entirely and enter the subfloor below.
Common Wet Room Waterproofing Mistakes (and How to Avoid Them)
Most wet room failures are not caused by the products used, but by small oversights in the process. These mistakes are easy to miss at the time, but they almost always show up later.
Assuming Tiles and Grout Are Enough
One of the most common misunderstandings is believing that tiles create a waterproof surface. They don’t. Grout is porous, and water will pass through it over time.
Without a fully sealed layer beneath the tiles, moisture can reach the structure below, leading to damp, mould, and damage that isn’t immediately visible.
Incomplete Tanking
Waterproofing only the immediate shower area is another frequent issue. In a wet room, water spreads beyond where you expect it to go.
Floors, wall junctions, and surrounding areas should all be included in the waterproofed zone. Missed sections often become the point where leaks develop.
Poor Sealing at Corners and Joints
Corners and wall‑to‑floor joints are under constant stress from movement and temperature changes. These areas need reinforcement, not just a coating.
Skipping tapes or relying on sealant alone is a common shortcut that leads to failure over time.
Incorrect Drain Detailing
If the waterproofing system is not properly connected to the drain, water can bypass the surface entirely. This is one of the hardest issues to fix once the room is finished.
Drain connections must be treated as part of the waterproofing system, not an afterthought.
Rushing Curing and Drying Times
Waterproofing products need time to cure properly. Tiling too soon or introducing moisture before the system is ready can compromise the seal.
This is a hidden risk, as problems may not appear until months or even years later.
Materials That Matter in Waterproofing
A wet room is only as reliable as the materials used to waterproof it. Even a well-planned process can fail if incompatible or unsuitable products are used together.
Waterproof Membranes vs Liquid Systems
Most wet rooms rely on either sheet membranes or liquid-applied waterproofing systems. Both can be effective when used correctly as part of a complete system.
Sheet membranes create a physical waterproof barrier and are often used where consistency and thickness control are critical. Liquid systems are applied directly to surfaces and form a seamless coating once cured.
The key is not which option is “better”, but that all components, like membranes, tapes, collars, and adhesives, are designed to work together. Mixing products from different systems increases the risk of weak points.
Adhesives, Grouts, and Sealants
Standard adhesives and grouts are not always suitable for wet rooms. Areas exposed to constant moisture and movement require flexible, water‑resistant materials.
Rigid products can crack over time, allowing moisture to pass through. Flexible adhesives and grouts help absorb movement without compromising the waterproof layer beneath.
Sealants also play a role, but they should support the waterproofing system, not replace it. Relying on sealant alone is a common cause of long‑term failure.
How Waterproofing Impacts Long‑Term Performance
Waterproofing is not just about stopping visible leaks. It protects parts of the home you never see, and it does so over many years of daily use.
When waterproofing is done properly, water is contained at the surface and directed safely toward the drain. When it isn’t, moisture can travel into floors, walls, and even neighbouring rooms without obvious warning signs.
Effective waterproofing helps to:
Prevent damp and mould from developing behind tiles
Protect subfloors, joists, and wall structures from water damage
Reduce the risk of leaks appearing in adjacent rooms or ceilings
Maintain the integrity of the space long after it is finished
Poor waterproofing rarely fails immediately. Issues often take months or years to become visible, by which point repairs usually require removing tiles and fixtures. That disruption is far greater than doing the job correctly from the start.
This is why waterproofing is best treated as a long‑term investment rather than a hidden detail.
Testing and Quality Checks Before Finishing
Before any tiles are fitted, the waterproofing system should be checked thoroughly. Once the room is finished, problems are far harder to identify and even harder to correct.
Visual inspections are the first step. The waterproofing layer should be continuous, with no gaps, thin spots, or missed areas, especially around corners, joints, drains, and pipe penetrations.
In many cases, controlled water testing is carried out to confirm the system is fully sealed. This allows any weaknesses to be identified while they are still accessible.
Catching issues at this stage can prevent:
Hidden leaks beneath finished surfaces
Water damage to surrounding rooms
Costly remedial work later on
Testing is not about overengineering the space. It is a final check that the waterproofing will perform as intended once the room is in everyday use.
Why Professional Waterproofing Matters
Wet rooms are one of the most demanding environments in a home when it comes to moisture. Waterproofing is not a single task, it is a sequence of decisions, materials, and checks that all need to work together.
Professional waterproofing ensures:
The correct system is chosen for the space
Materials are compatible and used in the right order
High‑risk areas such as drains and joints are properly detailed
Waterproofing is tested before the room is finished
Small mistakes at early stages can lead to major issues later on, often long after the room appears complete. This is why waterproofing is not the place to cut corners or rely on assumptions.
At Plumb Factory, wet rooms are approached with performance and longevity in mind. Waterproofing is treated as the foundation of the space, not an afterthought, helping to protect both the room itself and the wider structure of the home.
For more information about professionally designed and specified wet rooms, you can explore our wet rooms page.
Wet Room Waterproofing FAQs
1. Are tiles enough to make a wet room waterproof?
No. Tiles and grout are water‑resistant, not waterproof. Water can pass through them, which is why a sealed waterproofing layer beneath the surface is essential.
2. Does the entire room need to be waterproofed?
Any area exposed to water should be fully sealed. This usually includes the floor and lower sections of the walls, not just the immediate shower area.
3. What is tanking and why is it important?
Tanking is the process of creating a continuous waterproof barrier across the wet room. It prevents water from reaching the structure beneath and is the foundation of a reliable wet room.
4. Where do wet rooms most commonly fail?
Corners, wall‑to‑floor junctions, pipe penetrations, and drain connections are the most common failure points if they are not properly sealed.
5. Is waterproofing different on timber floors?
Yes. Timber floors are more prone to movement, which increases the risk of failure. Waterproofing systems must account for this movement to remain effective over time.
6. Can different waterproofing products be mixed?
Mixing products from different systems can lead to compatibility issues. Waterproofing works best when all components are designed to work together.
7. How long should waterproofing last in a wet room?
When done correctly using suitable materials, waterproofing should last for the lifetime of the room, not just a few years.
8. Can waterproofing problems be fixed after tiling?
In most cases, no. Repairs usually require removing finished surfaces, which is why issues should be identified and resolved before the room is completed.
9. Why is the drain such a critical detail?
The drain is where water concentrates. If the waterproofing system is not properly connected to it, water can bypass the surface and reach the subfloor below.
10. Is testing waterproofing really necessary?
Yes. Testing allows weaknesses to be identified before tiles are installed, when they can still be corrected without major disruption.